You’ll start by evaluating your substrate’s structural integrity and moisture levels, ensuring readings stay below 3 pounds per 1,000 square feet. Next, establish reference lines from the room’s centerpoint and dry-fit tiles to minimize perimeter cuts. Apply adhesive with a notched trowel at 45 degrees, setting tiles with a twisting motion. After 24-48 hours, remove spacers and grout joints to two-thirds tile depth. Finally, apply penetrating sealers once surfaces are properly cured. The following sections break down each phase’s critical specifications and technical requirements.
Key Takeaways
- Assess substrate integrity, verify dryness through moisture testing, and level surfaces within 1/8 inch over 10 feet before installation.
- Establish centerpoint reference lines using the 3-4-5 triangle method and dry-fit tiles to optimize layout and minimize cuts.
- Apply adhesive with appropriate notch trowel at 45 degrees, set tiles with twisting motion, and maintain consistent spacing throughout.
- Allow 24-48 hours for adhesive curing, then apply grout diagonally across joints and clean when thumbnail-firm.
- Select and apply penetrating sealers based on tile porosity, testing water beading to verify protection and document maintenance schedules.
Surface Preparation and Substrate Assessment
Proper tile installation hinges on thorough substrate evaluation before any adhesive touches the surface.
You’ll first assess the substrate’s structural integrity, checking for deflection that exceeds L/360 for floor installations. Next, you’ll verify the surface is clean, dry, and free from contaminants that compromise bond strength.
Moisture testing becomes critical at this stage. You’ll employ calcium chloride tests or relative humidity probes to measure moisture vapor emission rates, ensuring they don’t exceed manufacturer specifications. For concrete substrates, readings above 3 pounds per 1,000 square feet typically require mitigation.
Moisture vapor emissions exceeding 3 pounds per 1,000 square feet demand immediate mitigation before tile installation proceeds.
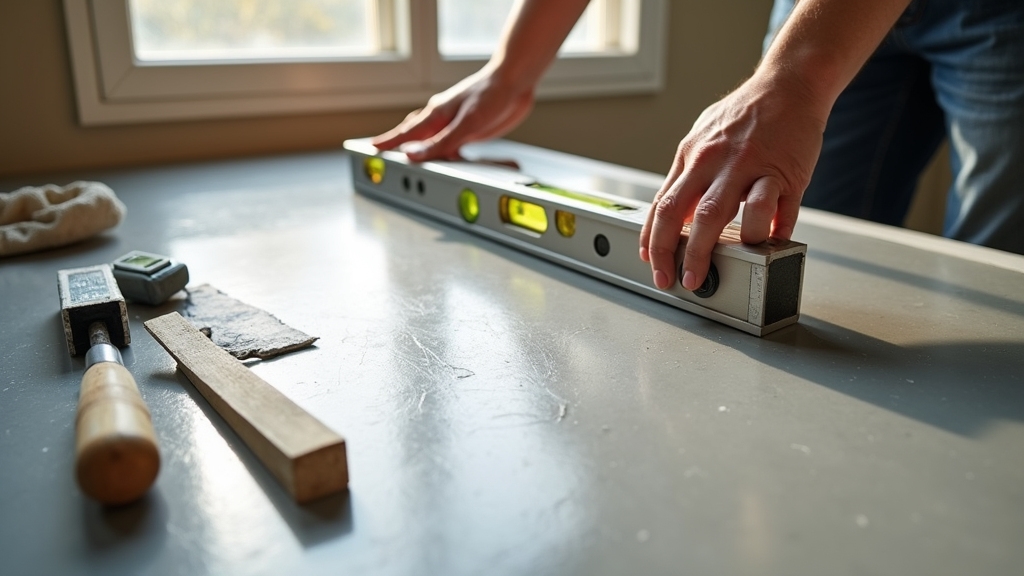
Surface leveling techniques follow assessment. You’ll apply self-leveling compounds or patching materials to correct deviations exceeding 1/8 inch over 10 feet. This creates the flat plane necessary for proper tile alignment and long-term performance.
Layout Planning and Dry Fitting
Before setting a single tile, you’ll establish reference lines that dictate the entire installation’s geometry. Snap perpendicular chalk lines from your room’s centerpoint, verifying 90-degree angles using the 3-4-5 triangle method. These axes serve as your primary alignment techniques for maintaining consistent coursing throughout the field.
Dry-fit tiles along both axes to determine ideal layout, adjusting reference lines to minimize cuts at perimeters. Different tile patterns require specific starting strategies:
| Pattern Type | Starting Point | Critical Consideration |
| Straight Set | Center intersection | Symmetrical border cuts |
| Diagonal | 45° offset | Increased waste factor |
| Herringbone | Center baseline | Pattern directional flow |
| Brick/Running Bond | Offset from center | Stagger percentage consistency |
You’ll evaluate grout joint width during this phase, ensuring pattern integrity before adhesive application.
Applying Adhesive and Setting Tiles
Three factors determine adhesive performance: substrate porosity, ambient conditions, and open time management.
You’ll select from tile adhesive types based on substrate characteristics—modified thin-set for moisture-prone areas, unmodified for uncoupling membranes, and epoxy for chemical resistance.
Apply adhesive using the appropriate notch trowel, holding it at a 45-degree angle to achieve proper ridge height and coverage. Work in manageable sections to prevent skinning.
Master tile positioning techniques by pressing each tile with a slight twisting motion, guaranteeing full mortar contact and eliminating voids.
You’ll maintain consistent grout joints using spacers while checking alignment with your reference lines. Periodically pull tiles to verify 95% coverage on floors and 80% on walls.
Back-butter large-format tiles to prevent lippage and guarantee proper adhesion across the entire surface.
Grouting and Joint Filling

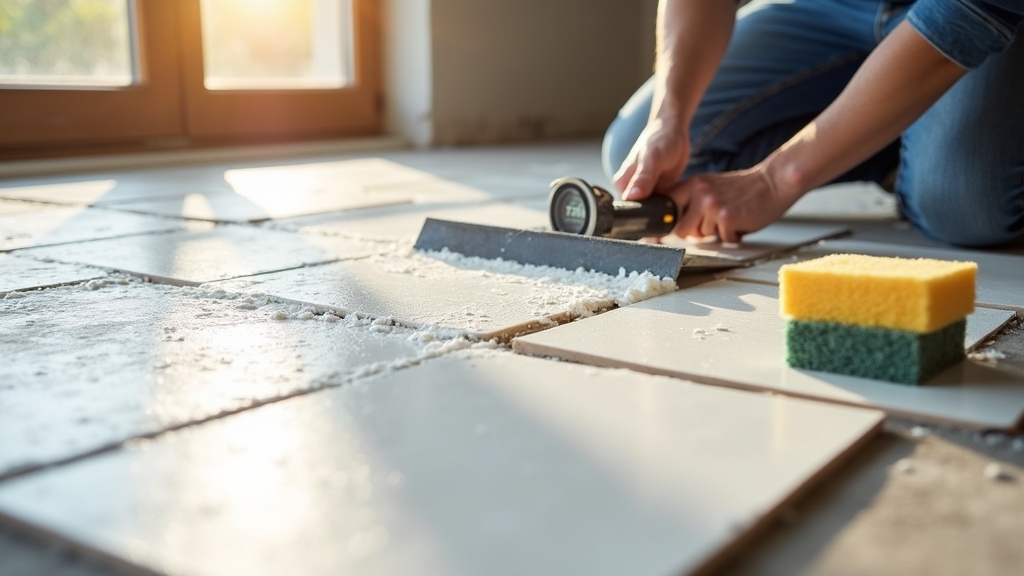
After allowing the adhesive to cure for 24-48 hours, you’ll prepare the tile surface for grout application by removing all spacers and cleaning joints to a depth equal to two-thirds of the tile thickness.
Select from available grout types—epoxy, urethane, or cement-based—matching your joint spacing requirements and environmental conditions.
Choose your grout—epoxy, urethane, or cement-based—based on joint width and where you’re installing the tile.
Mix grout to a peanut butter consistency, then force material diagonally across joints using a rubber float at 45-degree angles. Work in 10-square-foot sections to prevent premature setup.
Strike joints with a margin trowel or grout strike tool, achieving uniform depth and profile. Execute initial sponge cleaning when grout reaches thumbnail-firm consistency, using circular motions to avoid pulling material from joints.
Perform final haze removal after complete curing, typically 72 hours, using appropriate pH-neutral cleaners.
Sealing and Final Protection
Once grout has fully cured, you’ll assess tile porosity and surface characteristics to determine appropriate sealer selection—penetrating, topical, or enhancing formulations.
Your tile sealants options depend on substrate composition and intended performance outcomes.
Execute proper sealing techniques through these critical steps:
- Pre-clean surfaces using pH-neutral solutions to remove residual haze and contaminants
- Apply penetrating sealers to natural stone using microfiber applicators in thin, even coats
- Allow prescribed dwell time before buffing excess material to prevent surface residue
- Test water beading and absorption rates to verify adequate coverage and protection
- Document sealer specifications and reapplication intervals for maintenance protocols
You’ll implement multiple coats when enhanced stain resistance is required, ensuring complete saturation of porous materials while maintaining breathability for moisture vapor transmission.
Frequently Asked Questions
How Long Does Professional Tile Installation Typically Take to Complete?
Your installation duration varies from two to five days, depending on project factors: square footage, substrate preparation requirements, tile complexity, and adhesive curing time. You’ll need to account for layout precision, cutting methodology, and grout application sequencing protocols.
What Is the Average Cost per Square Foot for Professional Tile Installation?
You’ll pay $15-$25 per square foot for professional tile installation, which includes tile material costs ranging from $3-$15 and installation labor rates of $10-$15 per square foot, depending on complexity and region.
Can Tiles Be Installed Over Existing Flooring or Must It Be Removed?
You’ll find tile installation methods vary by substrate condition. Proper flooring preparation typically requires removing existing materials to guarantee adequate adhesion and prevent height changes. However, you can install over sound, level surfaces like concrete or existing tile when structurally appropriate.
How Soon Can I Walk on Newly Installed Tiles After Completion?
You’ll need to wait 24-72 hours before allowing foot traffic on newly installed tiles, depending on mortar type and environmental conditions. The adhesive’s drying time varies with thinset formulation, substrate porosity, temperature, and humidity levels affecting cure rates.
What Warranty or Guarantee Do Professional Tile Installers Typically Provide?
You’ll typically receive one-year installation guarantee covering workmanship defects like lippage, hollow spots, and grout failures. Separate material warranty coverage extends from manufacturers for tile durability. Professional installers provide written documentation specifying coverage scope and claim procedures.
Final Thoughts
You’ve now completed every essential phase of professional tile installation — from substrate evaluation and preparation to precise layout planning, tile setting, grouting, and final sealing. Each stage builds upon the last to ensure both structural integrity and aesthetic precision that stand the test of time.
Even with the right tools and techniques, achieving perfect tile alignment, consistent grout depth, and long-lasting waterproofing takes skill, patience, and experience. That’s why many homeowners and builders across Georgia trust Atlanta Tile Installer for precision workmanship and guaranteed results.
Whether you’re upgrading your home with bathroom tile installation, transforming your kitchen with backsplash and flooring tiles, or designing a stunning custom tile layout, our expert team ensures your vision becomes a flawless reality.
We proudly serve homeowners throughout Atlanta, Lawrenceville, Johns Creek, and Sandy Springs — delivering durable, code-compliant installations built to last for decades.
Ready to start your next tile project with professionals who care about craftsmanship and detail? Contact Atlanta Tile Installer today for your free consultation and discover why we’re Atlanta’s trusted name in precision tile installation.