
To maintain and clean your tile floors properly, sweep or vacuum daily to remove dirt, and mop weekly with a gentle cleaner. Keep an eye on grout lines and seal them every 6 to 12 months to prevent stains. For heavy cleaning, use a microfiber mop and DIY solutions like vinegar and baking soda for tough stains. Regular inspections help catch damage early. Stick around to discover more tips and tricks for keeping your tiles in top shape!
Key Takeaways
- Sweep or vacuum daily to eliminate dirt and debris, ensuring your tile floors remain clean and scratch-free.
- Mop weekly with a pH-neutral cleaner to maintain shine and prevent buildup on the tiles.
- Seal grout lines every 6 to 12 months to protect against stains and extend the life of your tile.
- Use eco-friendly cleaning solutions, like vinegar and baking soda, for effective and safe cleaning.
- Address spills immediately to prevent permanent stains and maintain the aesthetic appeal of your tile floors.
Essential Maintenance Tips for Tile Floors
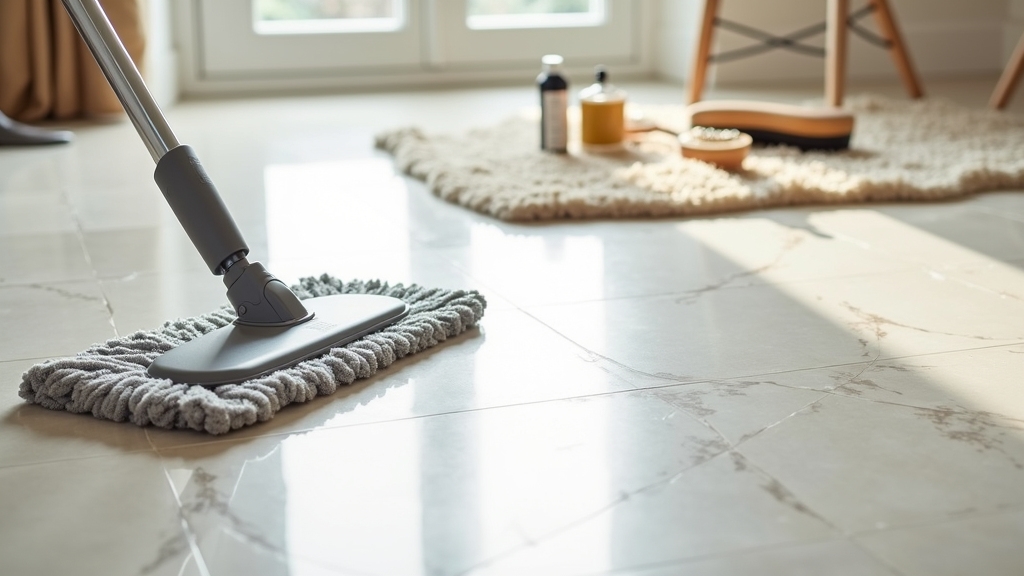
To keep your tile floors looking their best, you should adopt a regular maintenance routine. Start by sweeping or vacuuming daily to remove dirt and debris that can scratch the surface.
Regularly sweeping or vacuuming your tile floors helps prevent scratches and keeps them looking pristine.
Weekly mopping with a gentle cleaner will help maintain shine and cleanliness. Pay close attention to grout lines; they can easily discolor over time. For grout color options, consider sealing your grout to prevent stains and enhance its appearance.
Additionally, avoid harsh chemicals that can damage the tile or grout. If spills happen, clean them up immediately to prevent staining.
Every few months, inspect your floors for any damage, such as cracks or chips, and address issues promptly to guarantee tile floor longevity.
Understanding Different Types of Tile
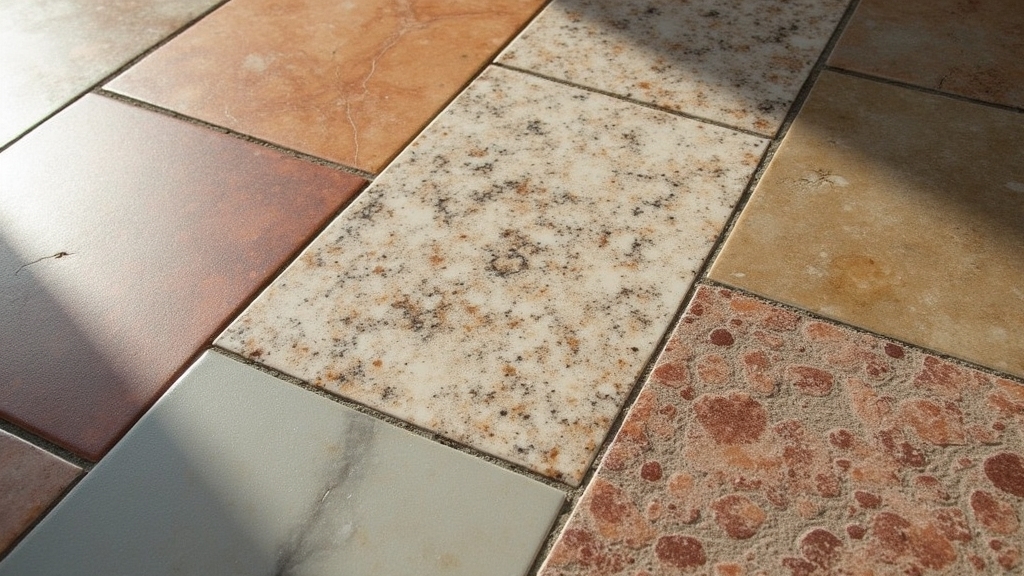
When it comes to tile floors, understanding the different types can make a big difference in cleaning and maintenance.
You’ll want to know the characteristics of ceramic tile, the advantages of porcelain, and the options available with natural stone.
Each type has unique features that can impact your cleaning routine and overall experience.
Ceramic Tile Characteristics
Ceramic tiles are a popular choice for flooring due to their durability and aesthetic appeal. They come in a variety of styles, colors, and patterns, allowing you to customize your space easily.
One key feature is their glossy finishes, which not only enhance the tile’s look but also make cleaning simpler. However, be mindful that glossy surfaces can be slippery, so consider the slip resistance if you have kids or pets.
Many ceramic tiles are designed with textured surfaces to improve grip, providing a safer option for high-traffic areas.
Porcelain Tile Advantages
Porcelain tiles offer a wealth of advantages that make them an excellent choice for flooring. One of the standout features is their porcelain durability; they’re incredibly resistant to scratches, stains, and moisture, making them ideal for high-traffic areas. You won’t have to worry much about wear and tear over time.
Additionally, their aesthetic appeal is impressive. Available in various colors, patterns, and finishes, porcelain tiles can mimic natural materials like wood or stone, allowing you to achieve your desired look without sacrificing performance.
This versatility makes them suitable for any room in your home, from kitchens to living areas. Ultimately, investing in porcelain tiles means you’ll enjoy a beautiful and long-lasting floor that meets your needs.
Natural Stone Options
If you’re considering flooring options, natural stone tiles present a unique and elegant choice. These tiles, including marble, granite, and slate, offer distinct aesthetics and durability.
However, to keep them looking their best, proper natural stone care is vital. Regular sweeping and mopping with a pH-balanced cleaner will help maintain their beauty.
Additionally, sealing techniques play an important role in protecting your tiles from stains and moisture. It’s advisable to reseal your natural stone tiles every 6 to 12 months, depending on usage and the type of stone.
Essential Tools for Cleaning Tile Floors
To keep your tile floors sparkling, you need the right tools and cleaning solutions.
We’ll cover the must-have items, the best mop types, and effective cleaning solutions that make the job easier.
With the right setup, you’ll tackle those floors like a pro!
Recommended Cleaning Solutions
When it comes to cleaning tile floors, choosing the right solutions is essential for achieving that sparkling finish. You’ll find a mix of eco-friendly solutions and commercial products that can effectively tackle dirt and grime.
Here are some recommended cleaning solutions:
- Vinegar and Water: A classic eco-friendly mix that’s great for light cleaning.
- Baking Soda Paste: Mix with water for tough stains; it’s non-toxic and safe.
- Commercial Tile Cleaner: Choose one that’s pH-balanced for your tile type.
- Essential Oils: Add to your cleaning solution for a pleasant scent and added antibacterial properties.
Using these options guarantees your tile floors stay clean and shiny without harsh chemicals.
Happy cleaning!
Must-Have Tools List
Cleaning tile floors effectively requires the right tools at your fingertips. Having the right equipment can simplify your tile maintenance and enhance your cleaning techniques. Here’s a must-have tools list to get you started:
| Tool | Purpose |
| Broom | Sweeping up dirt and debris |
| Microfiber Mop | Deep cleaning without scratching |
| Bucket | Mixing cleaning solutions |
With these essentials, you’ll tackle grime and keep your tile floors looking their best. A broom helps remove loose dirt, while a microfiber mop guarantees a thorough clean without damaging the surface. Don’t forget a sturdy bucket for mixing your preferred cleaning solutions. Equip yourself with these tools, and you’ll master tile floor maintenance in no time!
Best Mop Types
While choosing the best mop type for your tile floors, consider how different options can enhance your cleaning routine.
The right mop can make a significant difference, especially when it comes to mop materials and ergonomics. Here are four excellent choices:
- Microfiber Mop: Great for trapping dirt and providing a streak-free shine.
- Steam Mop: Uses hot steam to sanitize, perfect for tough stains and allergens.
- Sponge Mop: Versatile and easy to wring out, ideal for quick clean-ups.
- Flat Mop: Lightweight and easy to maneuver, great for reaching corners.
Select a mop that fits your cleaning style and guarantees comfort during use, making the task less of a chore.
How to Sweep and Vacuum Tile Floors Effectively
To effectively keep your tile floors looking pristine, start by sweeping or vacuuming regularly. This is essential for proper tile floor maintenance. Aim for at least once a week, or more often in high-traffic areas.
Use a soft-bristle broom or a vacuum with a hard floor setting to avoid scratching the tiles.
To protect your tiles, use a soft-bristle broom or a vacuum set for hard floors.
When sweeping, make sure to get into corners and under furniture where dust and debris can accumulate. For vacuuming, choose a lightweight model that’s easy to maneuver. Pay attention to attachments that can help you reach tight spaces.
If you have pets, you might need to increase your cleaning frequency to manage pet hair and dander.
Regular sweeping and vacuuming not only keep your floors clean but also prevent dirt buildup that can damage your tiles over time. Consistency is key to maintaining the beauty and longevity of your tile floors.
Best Practices for Mopping Tile Floors
When mopping tile floors, choosing the right mop and cleaning solution makes all the difference.
You’ll want to opt for a mop that suits your tile type and a solution that effectively tackles dirt without damaging the surface.
Let’s explore the best options to keep your floors sparkling clean.
Ideal Mop Types
Choosing the right mop can make all the difference in maintaining clean tile floors. The materials and techniques you choose will greatly impact your cleaning results.
Here are four ideal mop types to take into account:
- Microfiber Mops: Great for picking up dirt and grime without scratching tiles.
- Spin Mops: Their wringing mechanism allows for better control over moisture levels.
- Steam Mops: Perfect for sanitizing, using heat to eliminate bacteria and stains.
- Sponge Mops: These are versatile and can tackle tough spots, but make sure they’re rinsed well.
Effective Cleaning Solutions
While many cleaning solutions promise sparkling tile floors, knowing which ones work best can save you time and effort. Consider using natural cleaning methods for effective results. Homemade solutions, like vinegar and water or baking soda paste, can tackle tough stains without harsh chemicals.
Here’s a quick comparison:
| Solution Type | Ingredients | Benefits |
| Vinegar & Water | 1 cup vinegar, 1 gallon water | Cuts grease, disinfects |
| Baking Soda Paste | 1/2 cup baking soda, water | Gentle scrub, stain remover |
| Essential Oils Mix | 10 drops in water | Fresh scent, antimicrobial |
Choose the right solution, mop regularly, and your tile floors will shine!
Choosing the Right Cleaning Solutions for Tile Floors
Finding the right cleaning solutions for tile floors can feel overwhelming, but it doesn’t have to be. You want products that effectively clean without damaging your tiles or harming the environment.
Here are some tips to guide your choices:
- Look for Eco-Friendly Options: Choose biodegradable cleaners that won’t pollute your home or the planet.
- Check the pH Balance: Opt for solutions with a neutral pH, around 7, to avoid damaging the glaze on your tiles.
- Avoid Harsh Chemicals: Stay clear of bleach and ammonia, which can be too aggressive for tile surfaces.
- Consider Natural Ingredients: Vinegar and baking soda can be effective and safe alternatives for certain cleaning tasks.
DIY Cleaning Solutions for Tile Floors
If you want a budget-friendly way to keep your tile floors sparkling clean, DIY cleaning solutions might be just what you need.
Start with a simple vinegar solution—mix equal parts vinegar and water in a spray bottle. This natural cleaner cuts through grime effortlessly.
For tougher spots, sprinkle baking soda on the floor, then scrub with a damp cloth for a gentle salt scrub. You can also create citrus cleaners by combining lemon juice with water for a fresh scent.
Another option is to use castile soap mixed with water. Add a few drops of essential oils like tea tree for extra antibacterial power.
For a deeper clean, hydrogen peroxide can be effective, especially on grout.
Finally, a few drops of dish soap in a bucket of warm water can do wonders. These DIY solutions are easy to make and safe for your home!
How to Deal With Tough Stains on Tile Floors
Tough stains on tile floors can be frustrating, but with the right approach, you can tackle them effectively. Here are some effective cleaning techniques for stain removal:
- Identify the Stain: Knowing what caused the stain helps you choose the right cleaning method. Grease, ink, or food stains require different treatments.
- Use a Scrub Brush: For tougher stains, a scrub brush can help lift the dirt. Apply a suitable cleaner and scrub gently to avoid damaging the tile.
- Try Vinegar and Baking Soda: A paste made from vinegar and baking soda is great for breaking down tough stains. Apply, let it sit, then scrub and rinse.
- Commercial Cleaners: If home remedies don’t work, consider a commercial tile cleaner specifically designed for tough stains. Always follow the manufacturer’s instructions.
Preventing Grout Stains and Damage
To keep your grout looking fresh, you should seal it regularly to protect against stains.
Plus, don’t wait to clean up spills—addressing them immediately can save you from headaches later.
Implementing these simple steps will help maintain your tile floors in great condition.
Regular Sealing Techniques
While regular maintenance is essential for keeping your tile floors looking their best, sealing your grout periodically can greatly prevent stains and damage.
Here are some key sealing techniques to follow:
- Sealing Frequency: Aim to seal your grout every 6 to 12 months, depending on foot traffic and exposure to moisture.
- Clean the Surface: Before sealing, make certain the grout is clean and dry to maximize adhesion.
- Choose the Right Sealant: Use a high-quality grout sealer suitable for your tile type.
- Application Techniques: Apply the sealer evenly using a small brush or applicator, making sure all grout lines are covered.
Immediate Spill Cleanup
Immediate cleanup is essential when spills occur on your tile floors, as quick action can prevent grout stains and damage.
To start, grab a clean, dry cloth or paper towel and quickly blot the spill. Avoid rubbing, as this can push the liquid into the grout.
For better spill prevention, keep absorbent mats in high-traffic areas.
If the spill is sticky or stubborn, use a mild cleaning solution to assist with quick absorption. Always rinse the area with water afterward to remove any residue.
Remember, the sooner you act, the less likely you’ll face permanent staining or damage.
How to Prevent Scratches and Keep Your Tile Floors Pristine
Although tile floors are durable, they can still be scratched if you’re not careful. To keep your tiles looking pristine, follow these simple tips:
- Use Scratch Resistant Coatings: Apply a high-quality scratch resistant coating to protect your tiles from everyday wear and tear.
- Install Furniture Pads: Place furniture pads under chairs and tables to prevent scratches when moving them.
- Sweep Regularly: Dust and dirt can act like sandpaper. Sweep your floors frequently to remove debris that could scratch the surface.
- Avoid High Heels: If possible, ask guests to avoid wearing high heels on your tile floors, as they can leave unsightly marks.
Seasonal Maintenance Tips for Tile Floors
As the seasons change, your tile floors need different care to stay in top shape.
In spring, focus on deep cleaning, while summer calls for heat precautions to prevent damage.
Don’t forget winter moisture management to keep your tiles safe from water-related issues.
Spring Deep Cleaning Tips
When spring arrives, don’t you feel the urge to freshen up your home?
It’s the perfect time for some spring cleaning, especially for your tile floors. Here are four deep cleaning tips to help you get started:
- Clear and Organize: Remove furniture and rugs for a thorough clean, and consider seasonal organization of your space.
- Sweep and Vacuum: Get rid of dust and debris with a broom or vacuum before mopping.
- Use the Right Cleaner: Choose a pH-neutral cleaner designed for tile to avoid damaging the surface.
- Mop with Care: Use a damp mop, ensuring it’s not soaking wet, to prevent water damage.
With these tips, your tile floors will shine beautifully for the season!
Summer Heat Precautions
While summer brings warmth and sunshine, it can also take a toll on your tile floors. The intense heat can lead to sun damage, causing fading or discoloration over time.
To protect your tiles, consider using heat-resistant mats in areas that receive direct sunlight. These mats not only shield your flooring but also add a decorative touch.
Additionally, keep your windows covered during peak sun hours to minimize exposure. Regularly sweeping and mopping your floors helps remove dust and dirt that can scratch the surface.
Finally, it’s a good idea to apply a sealant suitable for your tile type; this enhances heat resistance and keeps your floors looking fresh.
Taking these precautions will guarantee your tile floors endure the summer beautifully.
Winter Moisture Management
To keep your tile floors in top shape during winter, managing moisture is essential. The cold months often bring increased humidity and wet conditions that can damage your tiles.
Here are some practical tips for winter moisture management:
- Install moisture barriers: Use mats or rugs at entryways to catch wetness from shoes.
- Control humidity: Use a dehumidifier in your home to maintain ideal humidity levels.
- Regular cleaning: Wipe up spills and moisture immediately to prevent slipping and staining.
- Ventilate: Open windows occasionally to allow fresh air circulation, especially during sunny days.
The Importance of Sealing Natural Stone Tiles
Sealing natural stone tiles is essential for preserving their beauty and longevity, as it protects them from stains, moisture, and damage. Without a proper seal, your tiles are vulnerable to spills and grime, which can lead to costly repairs.
You’ll want to use effective sealing techniques tailored to the specific type of stone you have. For example, porous stones like marble or limestone require more frequent sealing compared to denser options like granite.
Applying a high-quality sealant not only enhances the color and texture of your tiles but also makes cleaning easier. When dirt and spills don’t penetrate the surface, you can maintain your floors with minimal effort.
Over time, this simple step can greatly extend the life of your tiles, ensuring they remain a stunning feature in your home for years to come.
Don’t skip this vital part of tile care; it’s key to achieving lasting stone longevity.
Removing and Preventing Mold on Tile Floors
Mold can be a persistent problem on tile floors, especially in damp areas like bathrooms and kitchens. To tackle this issue effectively, you’ll want to focus on mold prevention and use the right cleaning techniques.
Mold thrives on tile floors in damp spaces like bathrooms and kitchens, making prevention and proper cleaning essential.
Here’s how to keep your tiles mold-free:
- Regular Cleaning: Sweep and mop your tile floors at least once a week to remove dirt and moisture.
- Use Vinegar: A vinegar solution can help kill mold spores. Mix equal parts water and vinegar, and mop your floors with it.
- Seal Grout: Apply a grout sealer annually to prevent moisture from seeping in and promoting mold growth.
- Ventilation: Maintain proper ventilation in moist areas. Use exhaust fans or open windows to reduce humidity.
Understanding the Impact of Humidity on Tile Maintenance
Humidity plays a significant role in tile maintenance, especially in areas prone to moisture. High humidity can lead to excess moisture, promoting mold and mildew growth, which can damage your tiles and grout. To combat this, effective humidity control is essential. You should aim to maintain a moisture balance in your home, ideally between 30% and 50%.
Using dehumidifiers in damp areas like basements can help manage humidity levels. Proper ventilation in bathrooms and kitchens also prevents moisture buildup.
When cleaning your tile floors, be mindful of the cleaning products you use; some can exacerbate humidity issues if not rinsed thoroughly.
Regularly check for signs of moisture damage, as early intervention can save you from costly repairs. By focusing on humidity control, you’ll not only extend the life of your tiles but also create a healthier living environment.
Regular Inspections: What Should You Look For?
How often do you check your tile floors for signs of wear and damage? Regular inspections are key to maintaining their beauty and durability.
Here’s what you should look for:
- Crack Detection: Look for any cracks in the tiles. Even small ones can lead to bigger issues if ignored.
- Grout Inspection: Check the grout lines for discoloration or damage. Cracked or missing grout can allow moisture to seep through.
- Surface Wear: Notice any dull spots or scratches. This could indicate the need for cleaning or refinishing.
- Loose Tiles: Gently tap tiles to see if any sound hollow. Loose tiles can be a sign of underlying issues.
How to Handle Tile Floor Repairs?
After completing regular inspections, you might notice issues that require immediate attention. Common issues on your tile floor can include cracked tiles or damaged grout.
Start with simple repair strategies like grout repair or crack filling, which are often manageable as DIY fixes. For minor cracks, you can use a repair compound that matches your tile’s color.
If tiles are severely damaged, tile replacement might be necessary. Assess the maintenance frequency of your floors to prevent future issues.
When evaluating costs, consider both DIY options and professional services. DIY repairs can save money, but complex jobs might need an expert.
Always conduct a cost assessment to determine the best approach for your situation. By addressing these repairs promptly, you can maintain your tile floor’s appearance and longevity, ensuring it remains a beautiful feature in your home.
Benefits of Professional Tile Cleaning Services
While you might think regular mopping is enough to maintain your tile floors, professional cleaning services offer benefits that go beyond basic upkeep. Here’s why you should consider them:
- Enhanced Tile Longevity: Professionals use specialized equipment and techniques that remove deep-seated grime, helping your tiles last longer.
- Improved Cleaning Frequency: With a professional service, you won’t have to worry about when to clean; they can set a schedule that fits your needs.
- Expert Knowledge: They understand different tile materials and know exactly how to treat them, ensuring no damage occurs during cleaning.
- Time Savings: You can focus on what matters most to you while experts handle the dirty work.
Investing in professional tile cleaning not only elevates the appearance of your floors but also contributes to their longevity, making it a smart choice for any homeowner.
When to Consider Replacing Your Tile Floors?
When should you think about replacing your tile floors? If you notice cracked tiles or uneven surfaces, it’s time to evaluate your flooring. Cracked tiles not only affect the look of your space but can also lead to further damage if left unchecked.
Uneven surfaces can pose a tripping hazard and make cleaning more challenging.
Another sign you should consider replacement is if the grout is consistently discolored or crumbling, indicating that water may be seeping underneath. If you’re spending more on repairs than you’d on a new installation, it’s probably wise to replace the tiles.
Lastly, if your tiles are outdated and don’t match your style anymore, a fresh look could rejuvenate your space.
Don’t wait until problems worsen; address them proactively to maintain a safe and visually appealing environment.
Eco-Friendly Cleaning Options for Tile Floors
If you’ve decided to keep your tile floors, maintaining them with eco-friendly cleaning options can enhance their longevity and keep your home safe.
By opting for green cleaning methods, you benefit both your floors and the environment. Here are four sustainable products you can use:
Opting for eco-friendly cleaning methods benefits your tile floors while promoting a healthier environment.
- Vinegar and Water: Mix equal parts for a natural, effective cleaner that cuts through grime.
- Baking Soda: Sprinkle on stains and scrub with a damp cloth for a gentle abrasive.
- Castile Soap: This biodegradable soap works well in warm water for regular mopping.
- Essential Oils: Add a few drops to your cleaning solution for a fresh scent and extra antibacterial properties.
Using these eco-friendly methods not only keeps your tile floors looking great but also promotes a healthier home atmosphere.
Choose sustainable products and enjoy a cleaner space without harsh chemicals!
Frequently Asked Questions
Can I Use Vinegar on My Tile Floors?
Yes, you can use vinegar on your tile floors, but be cautious. While vinegar’s effectiveness helps clean, it can damage certain tile finishes. Always check your tile safety before using vinegar to avoid issues.
How Often Should I Deep Clean My Tile Floors?
You should deep clean your tile floors every 1-3 months, depending on foot traffic. For effective tile maintenance, follow these tips: sweep regularly, use gentle cleaners, and address spills promptly to keep them looking great.
Are There Specific Tiles That Are Easier to Clean?
Yes, glossy finishes are generally easier to clean since they repel dirt and stains effectively. However, consider slip resistance too; some glossy tiles may be slippery, so balance ease of cleaning with safety for your space.
What Should I Do if My Grout Becomes Discolored?
If your grout becomes discolored, identify discoloration causes like stains or moisture. For grout cleaning, use a mixture of baking soda and vinegar or a commercial cleaner. Rinse thoroughly to restore its original color and shine.
How Can I Remove Scratches From My Tile Floors?
To remove scratches from your tile floors, use a scratch repair kit specifically designed for tile maintenance. Apply the filler, smooth it out, and let it dry for a seamless finish that restores your tiles’ appearance.
Final Thoughts
Keeping tile floors looking their best comes down to consistent habits: sweep or vacuum regularly, mop with a gentle cleaner, stay on top of grout care, and address spills or stains before they set. With the right routine, your tile can stay clean, durable, and great-looking for years.
If you’re dealing with cracked tile, stained grout that won’t come clean, or you’re ready for a fresh upgrade, let Atlanta Tile Installer help you take the next step. From flooring installation and custom tile design to kitchen tile installation and shower tile installation, our team is ready to deliver results that last. Reach out today through our contact page to schedule your consultation.